Managing Invoices
The Invoices page is the core of ChronoFlow. From here you select an existing Bexio invoice or create a new one, pick the Kimai timesheet entries to include, and post them as line items.
Step-by-step
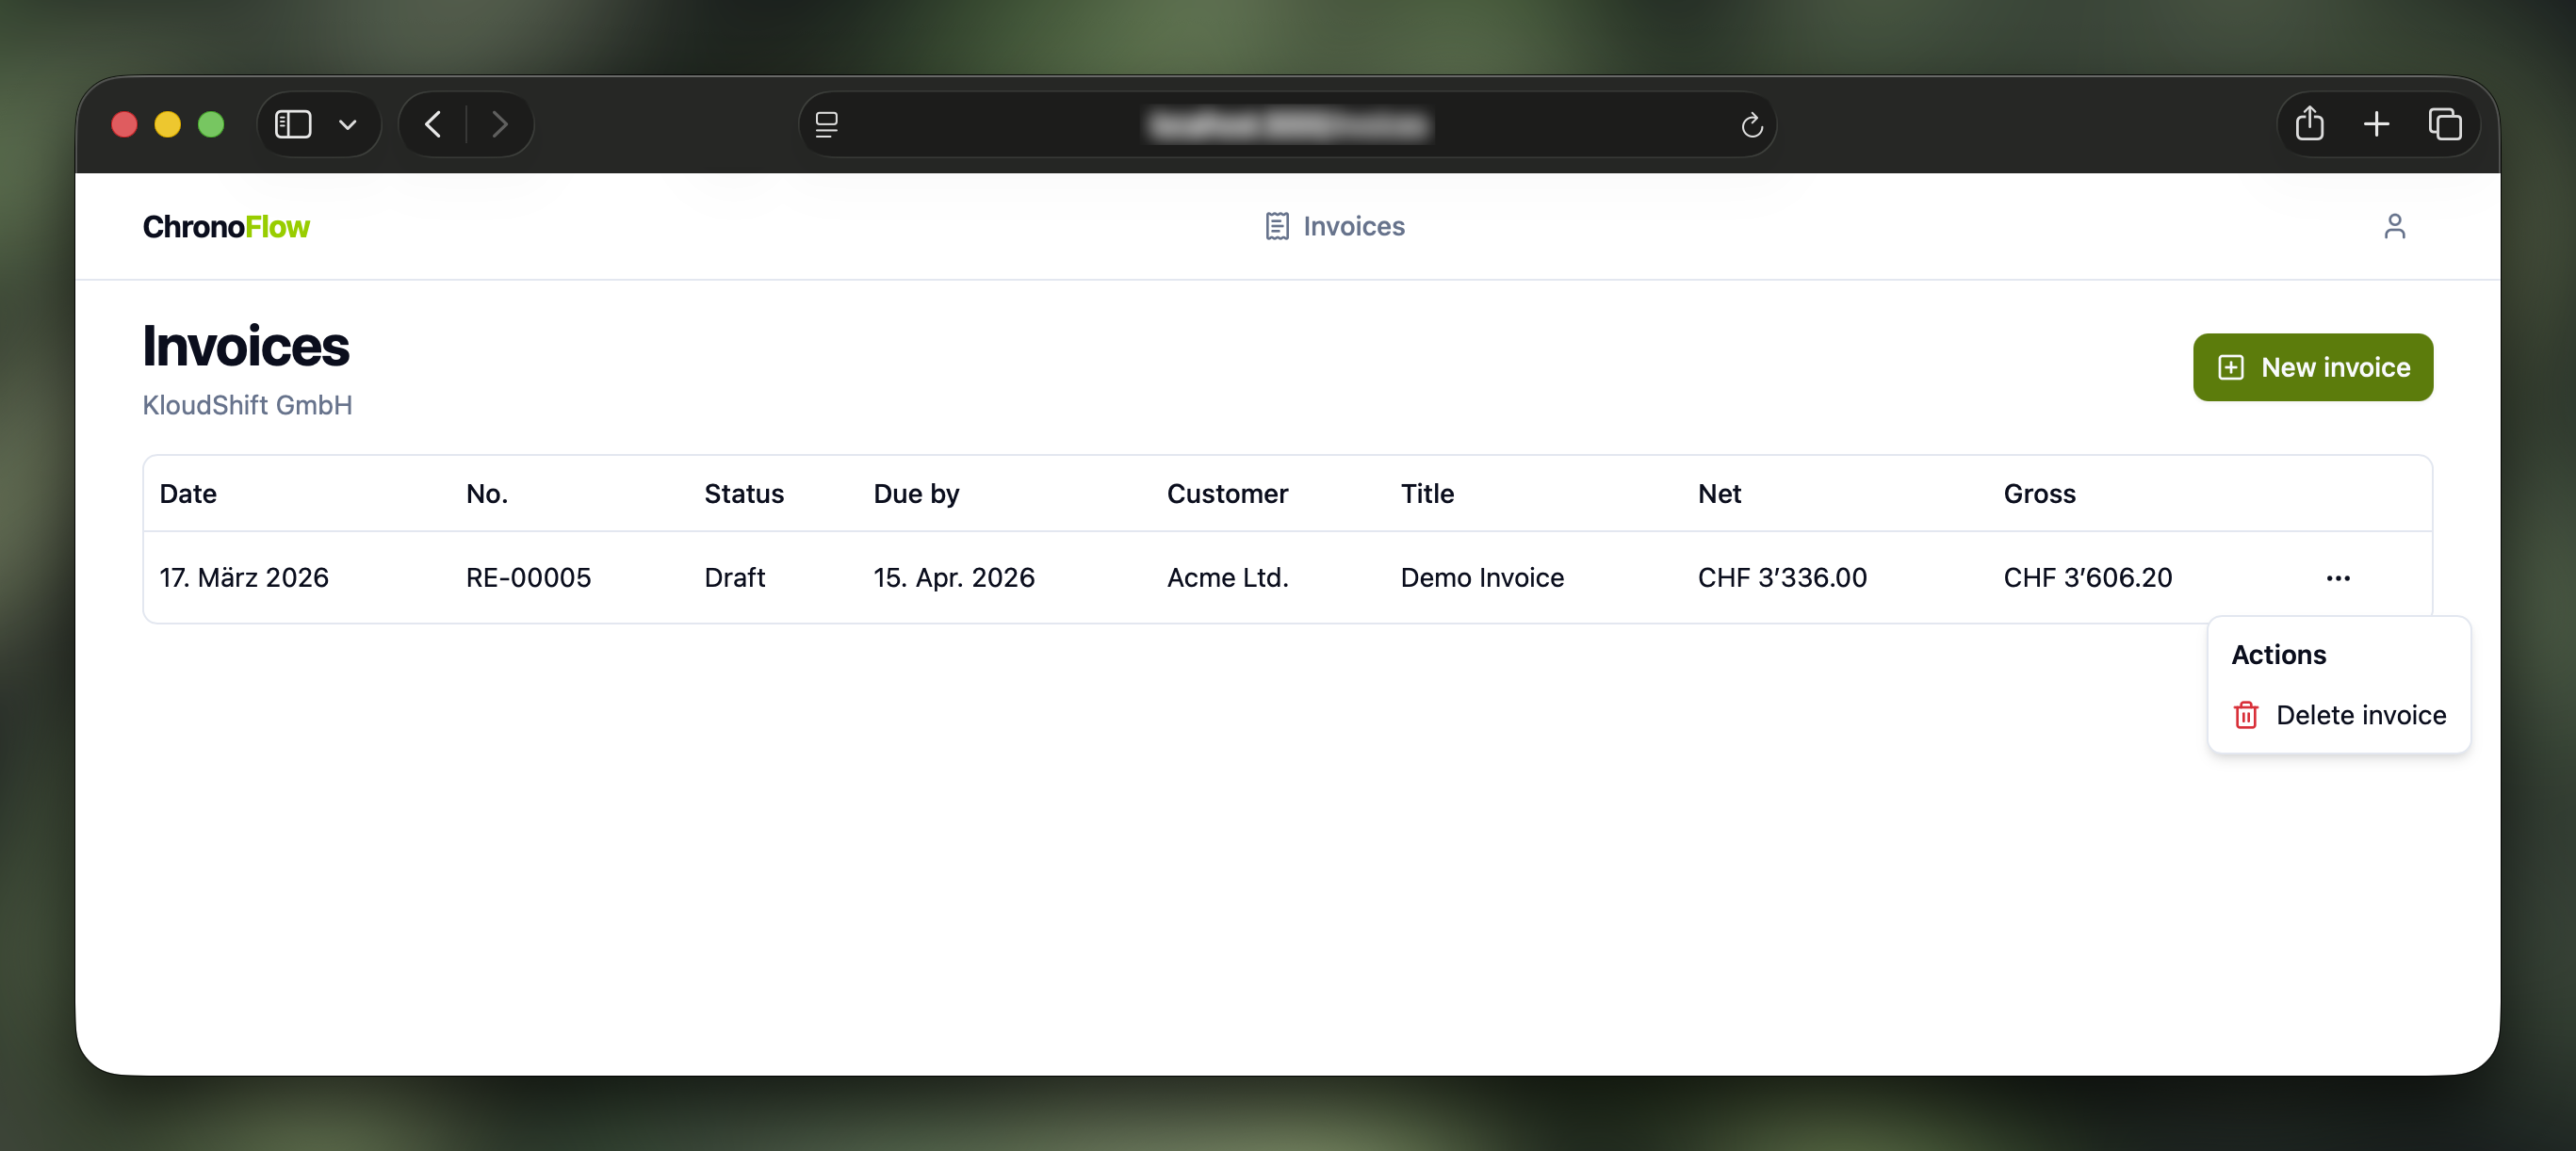
1. Select an existing invoice or create a new one
Select an invoice from the list or create a new one by clicking New invoice. Only invoices with the status Draft can be edited or deleted via the context menu.

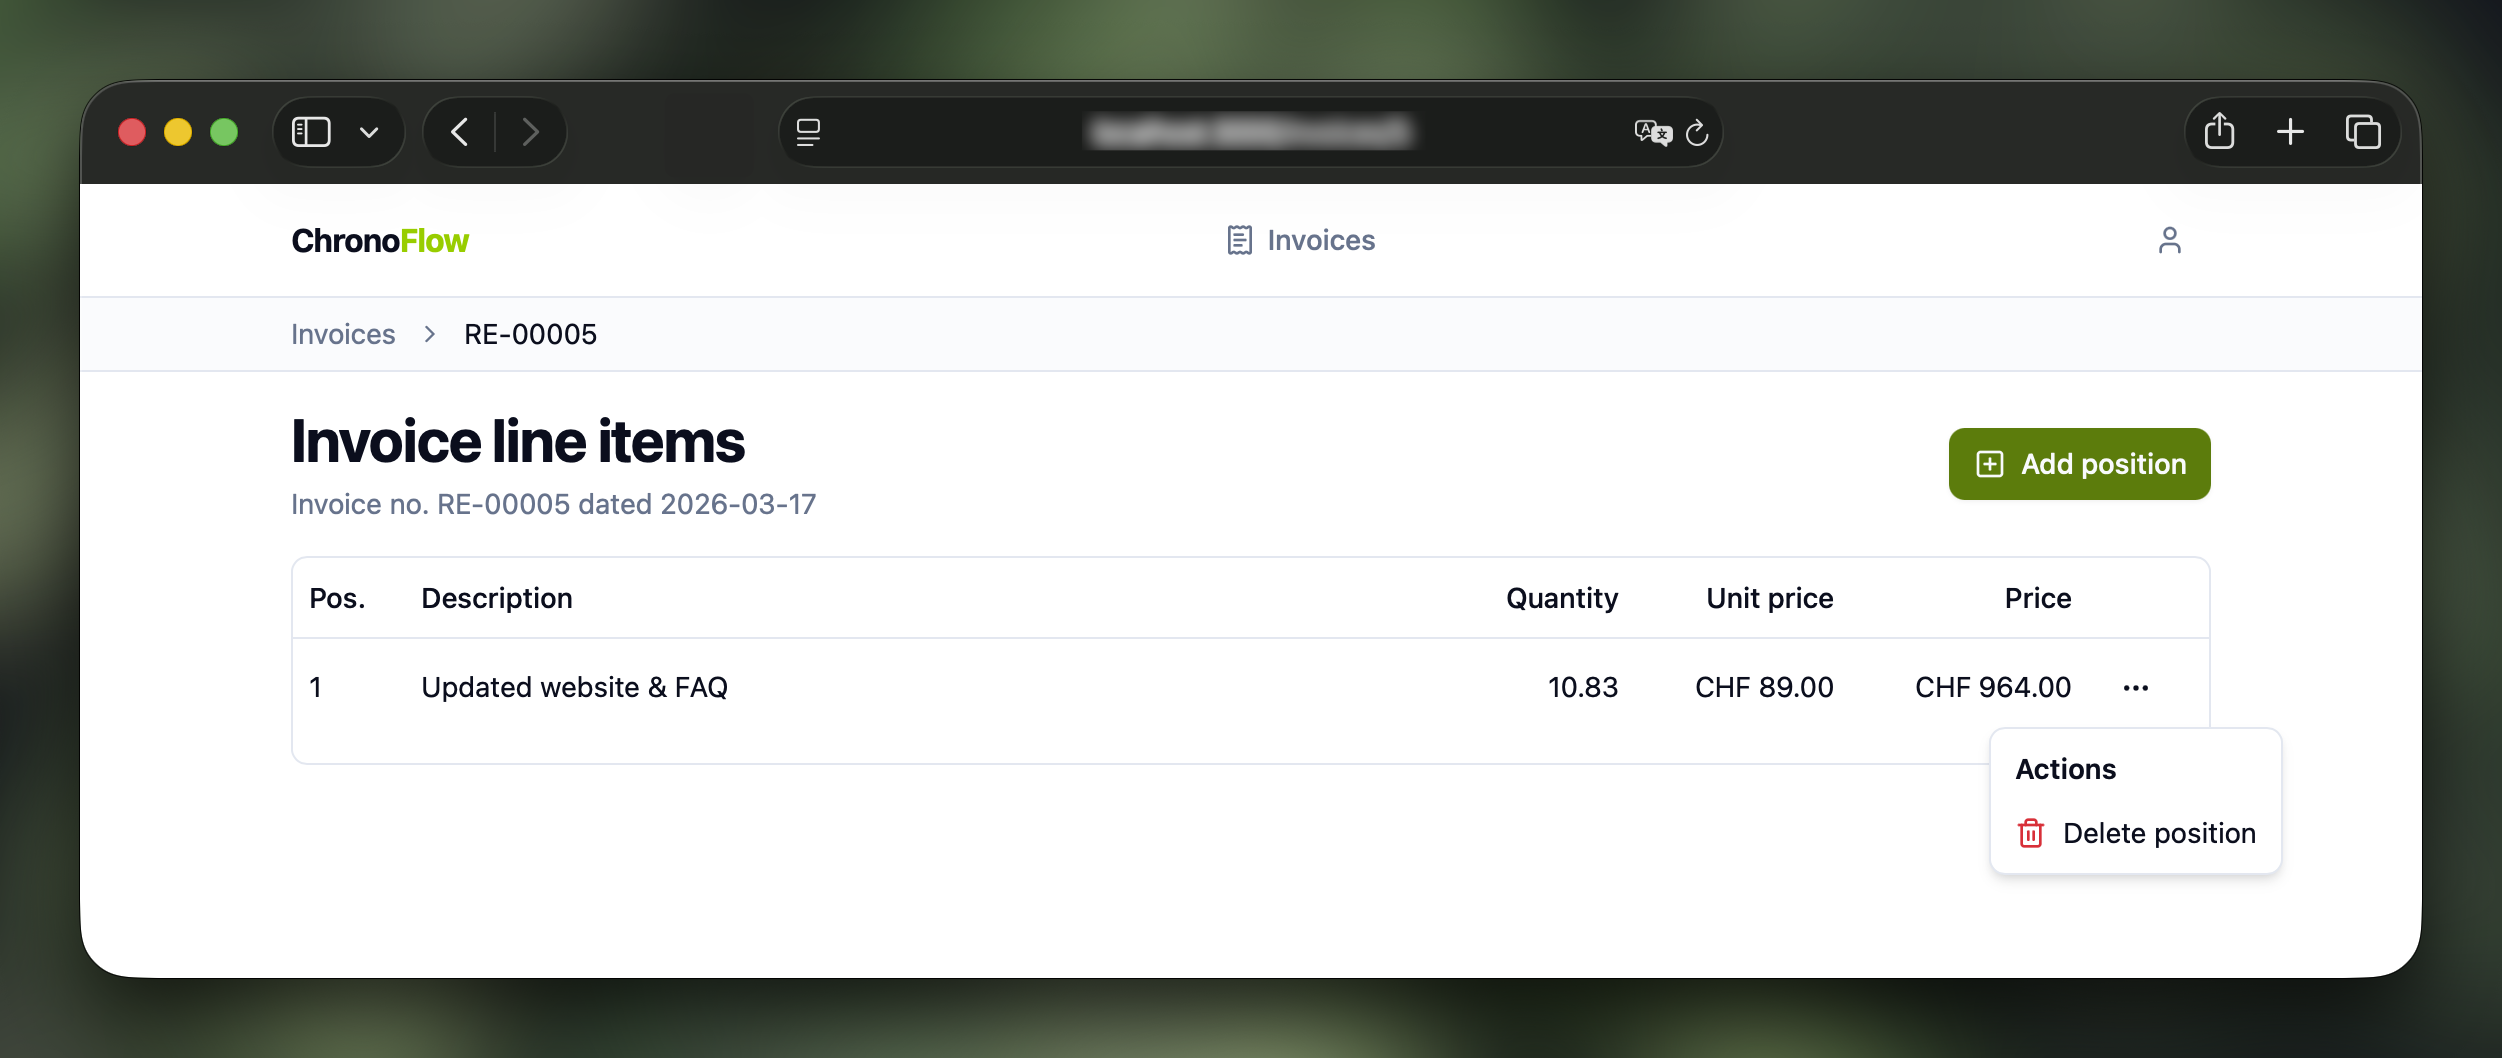
2. Add positions to your invoice
This view lists the existing positions on the invoice. Add new positions by clicking Add position, or remove existing ones using the trash icon in the context menu.
3. Select Kimai timesheets to include
This view lists all Kimai timesheet entries and lets you filter them. You can select multiple entries to include in a single invoice position — the selected entries are accumulated and shown at the bottom of the page.
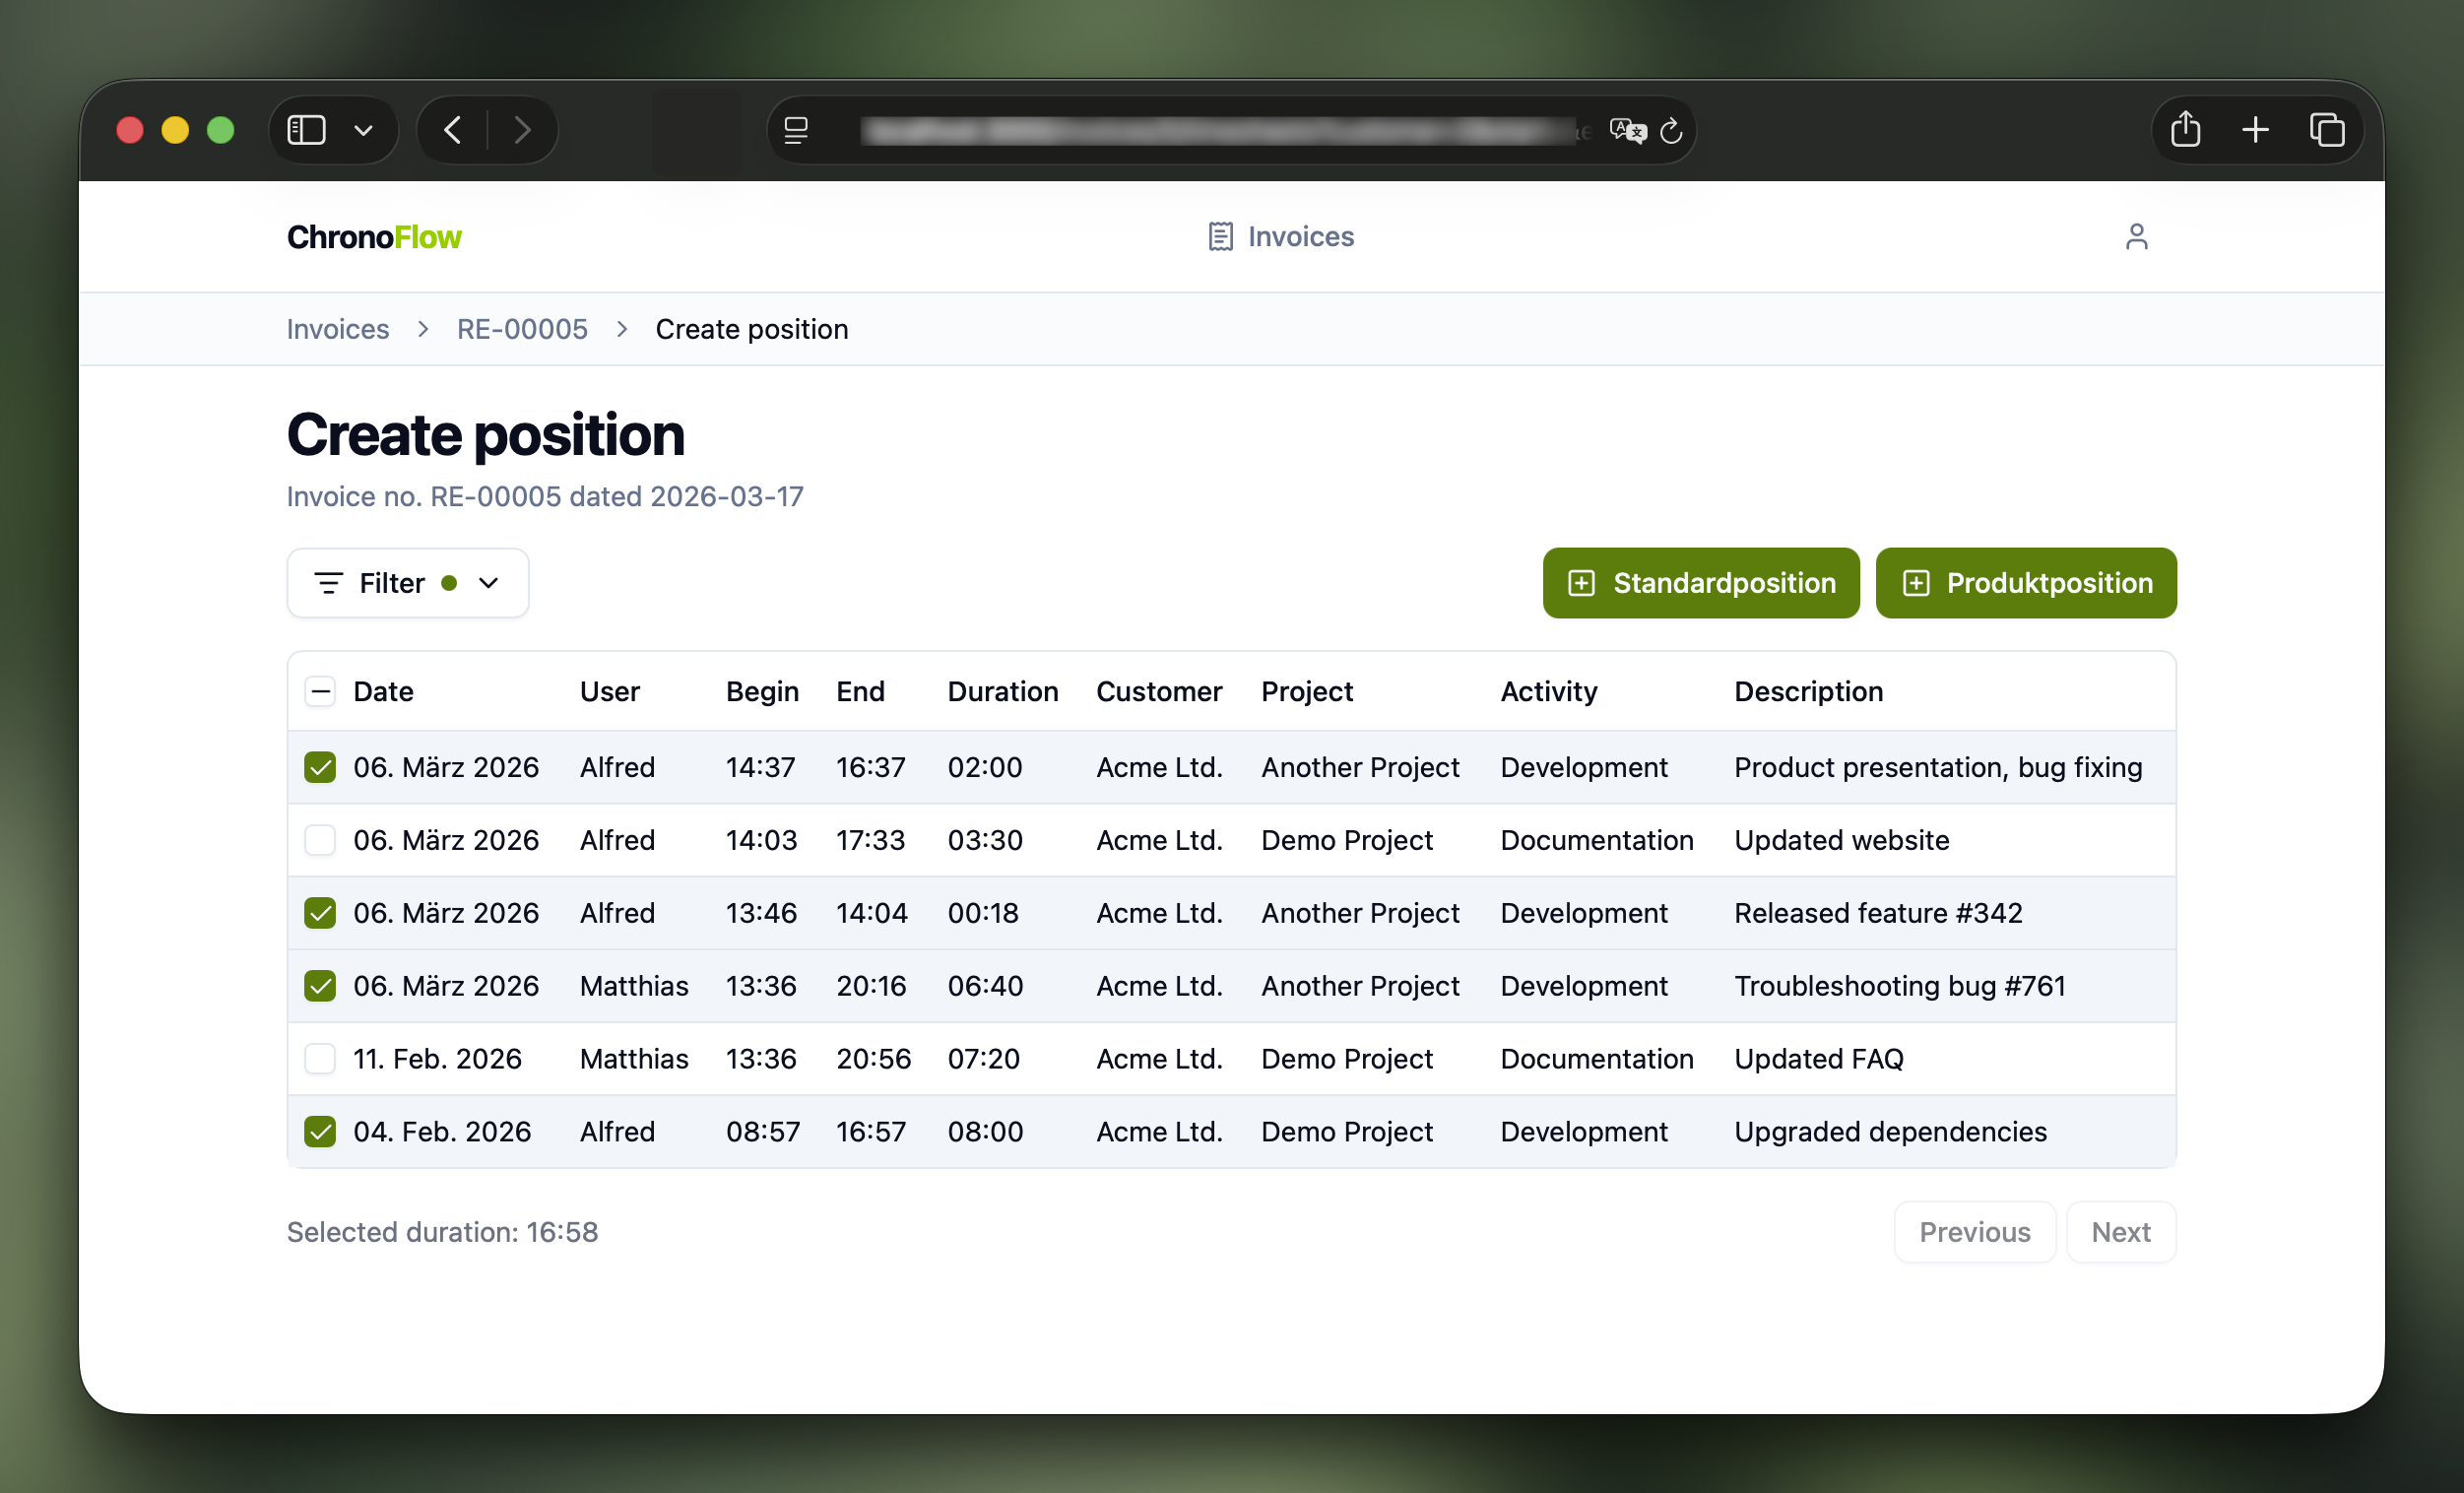
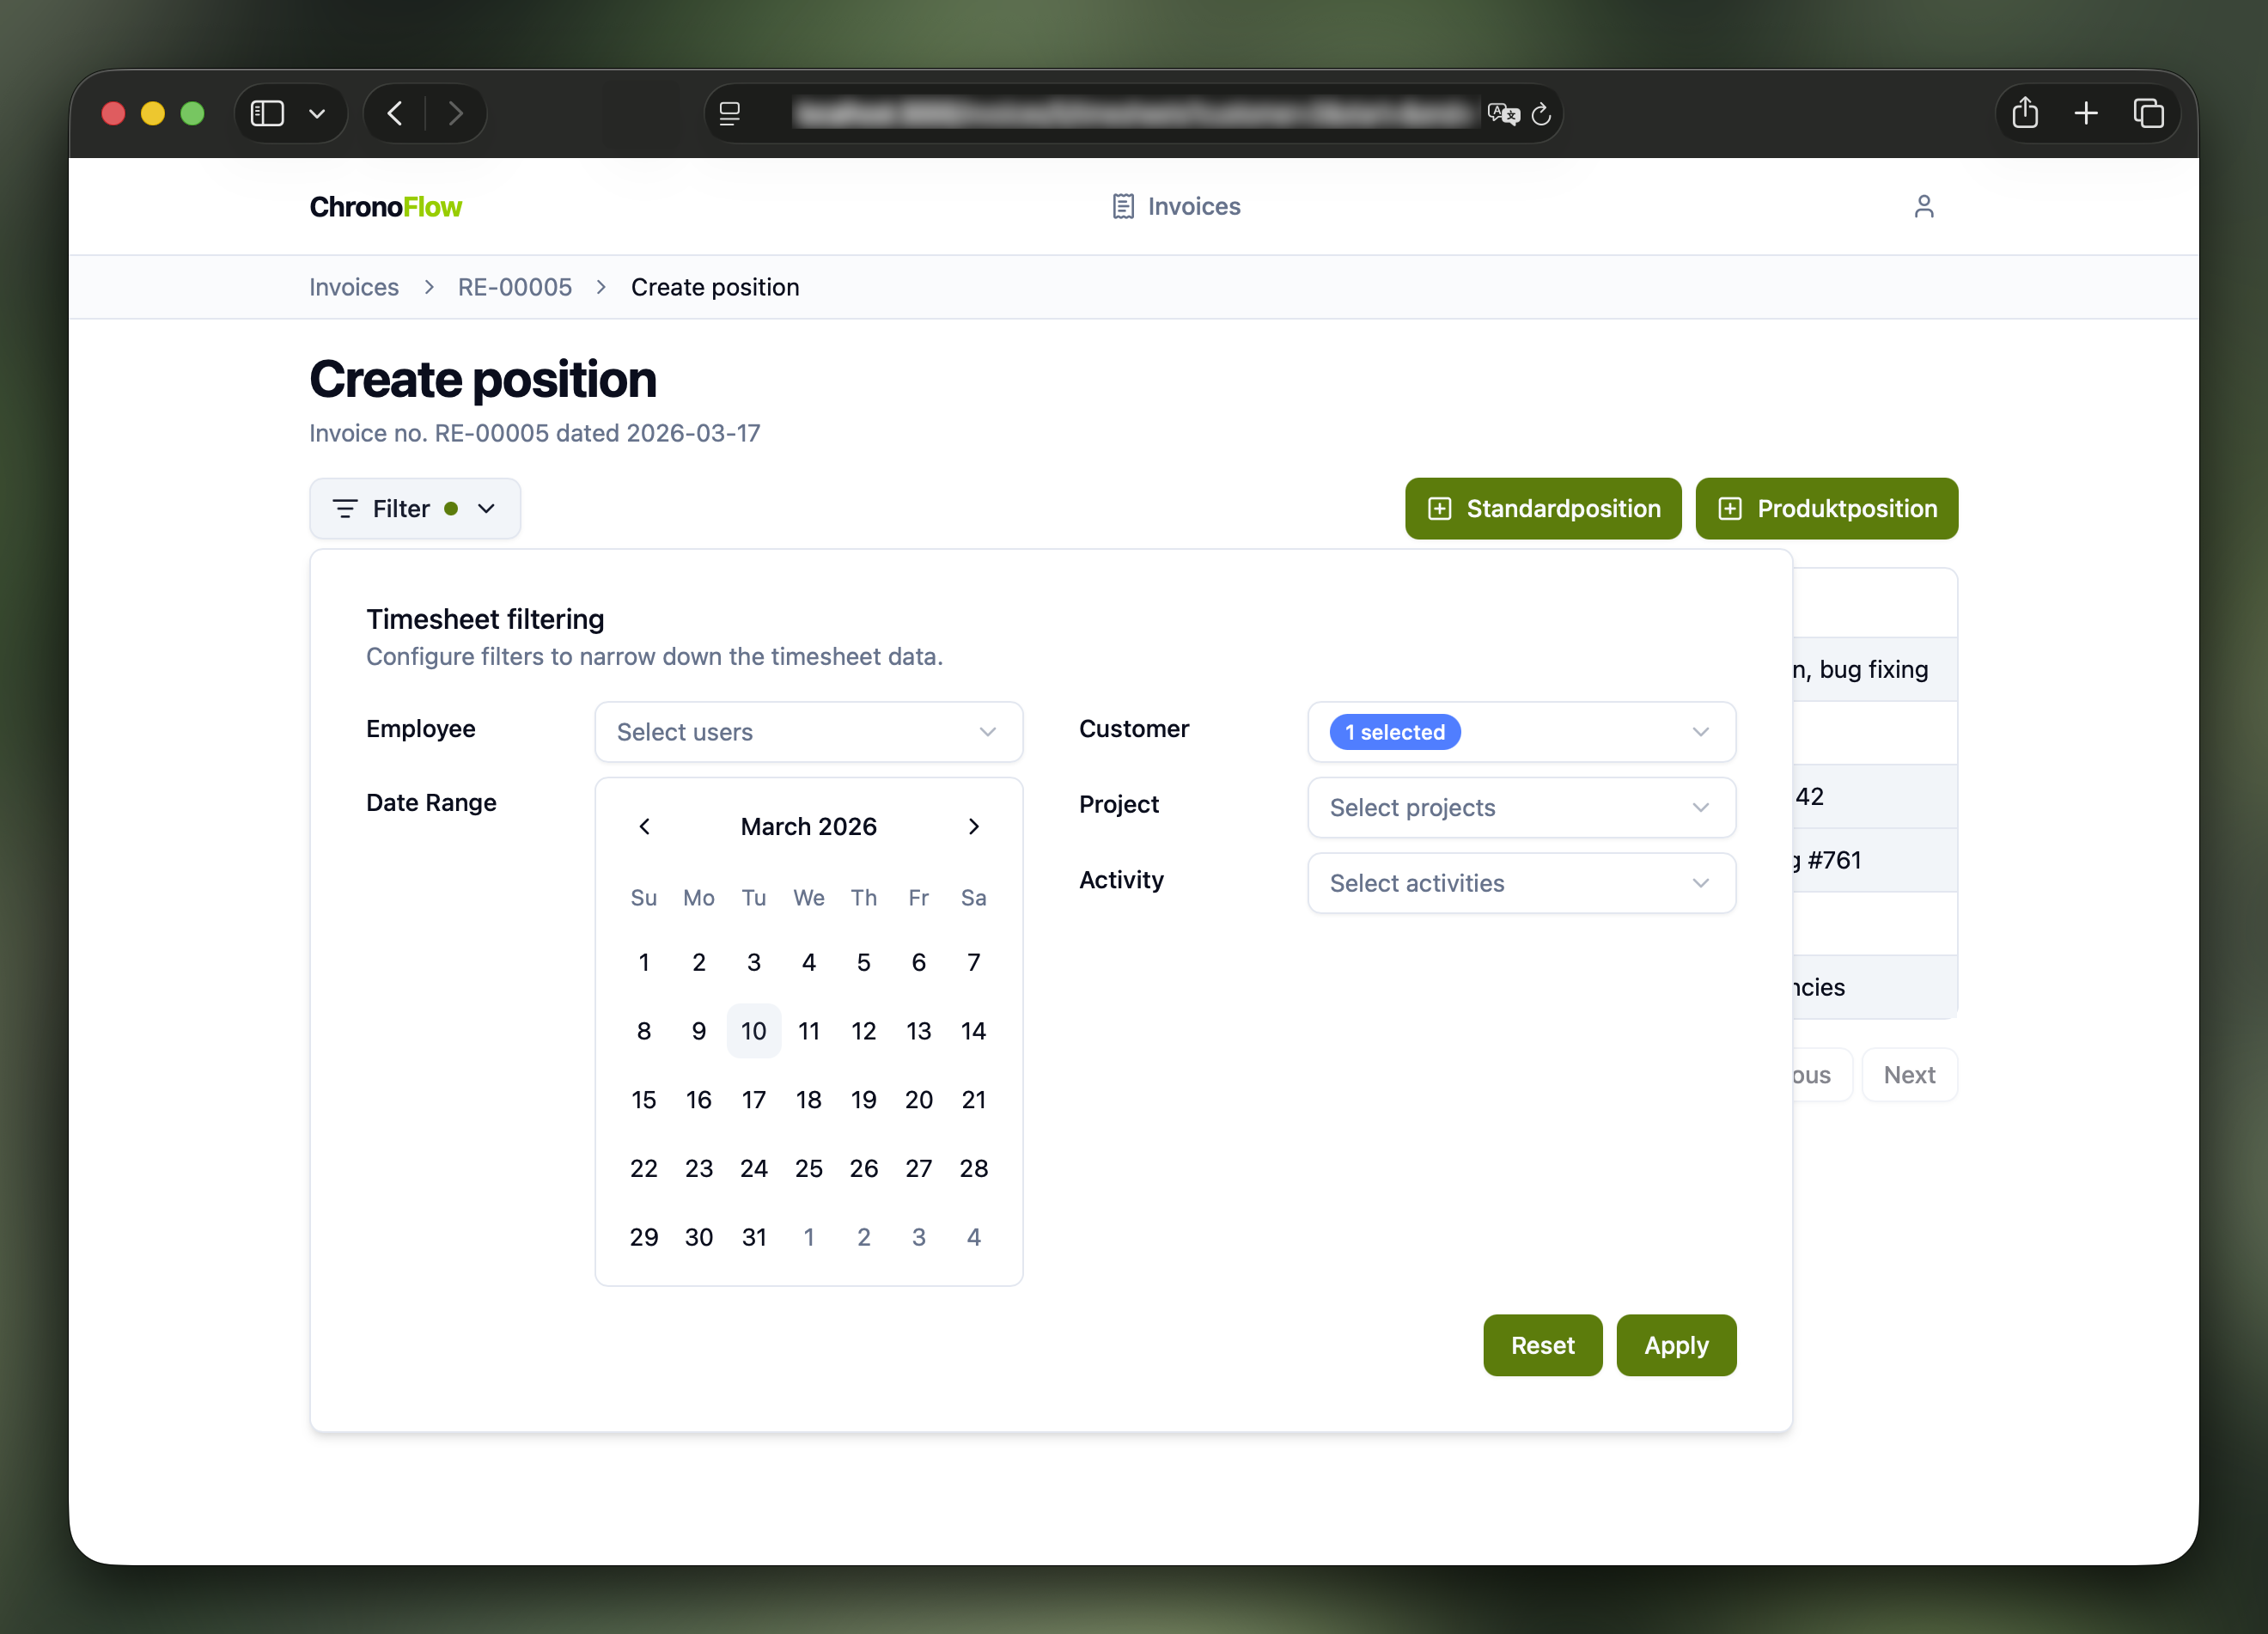
A green dot on the filter button indicates that a filter is active. Click the filter button to open the filter panel, where you can combine any of the following:
- Kimai user (employee)
- Date range
- Customer
- Project (grouped by customer)
- Activity (grouped by project)
Click Create Default Position to open a confirmation dialog where you can enter a description. You can also let AI generate an editable summary for you.
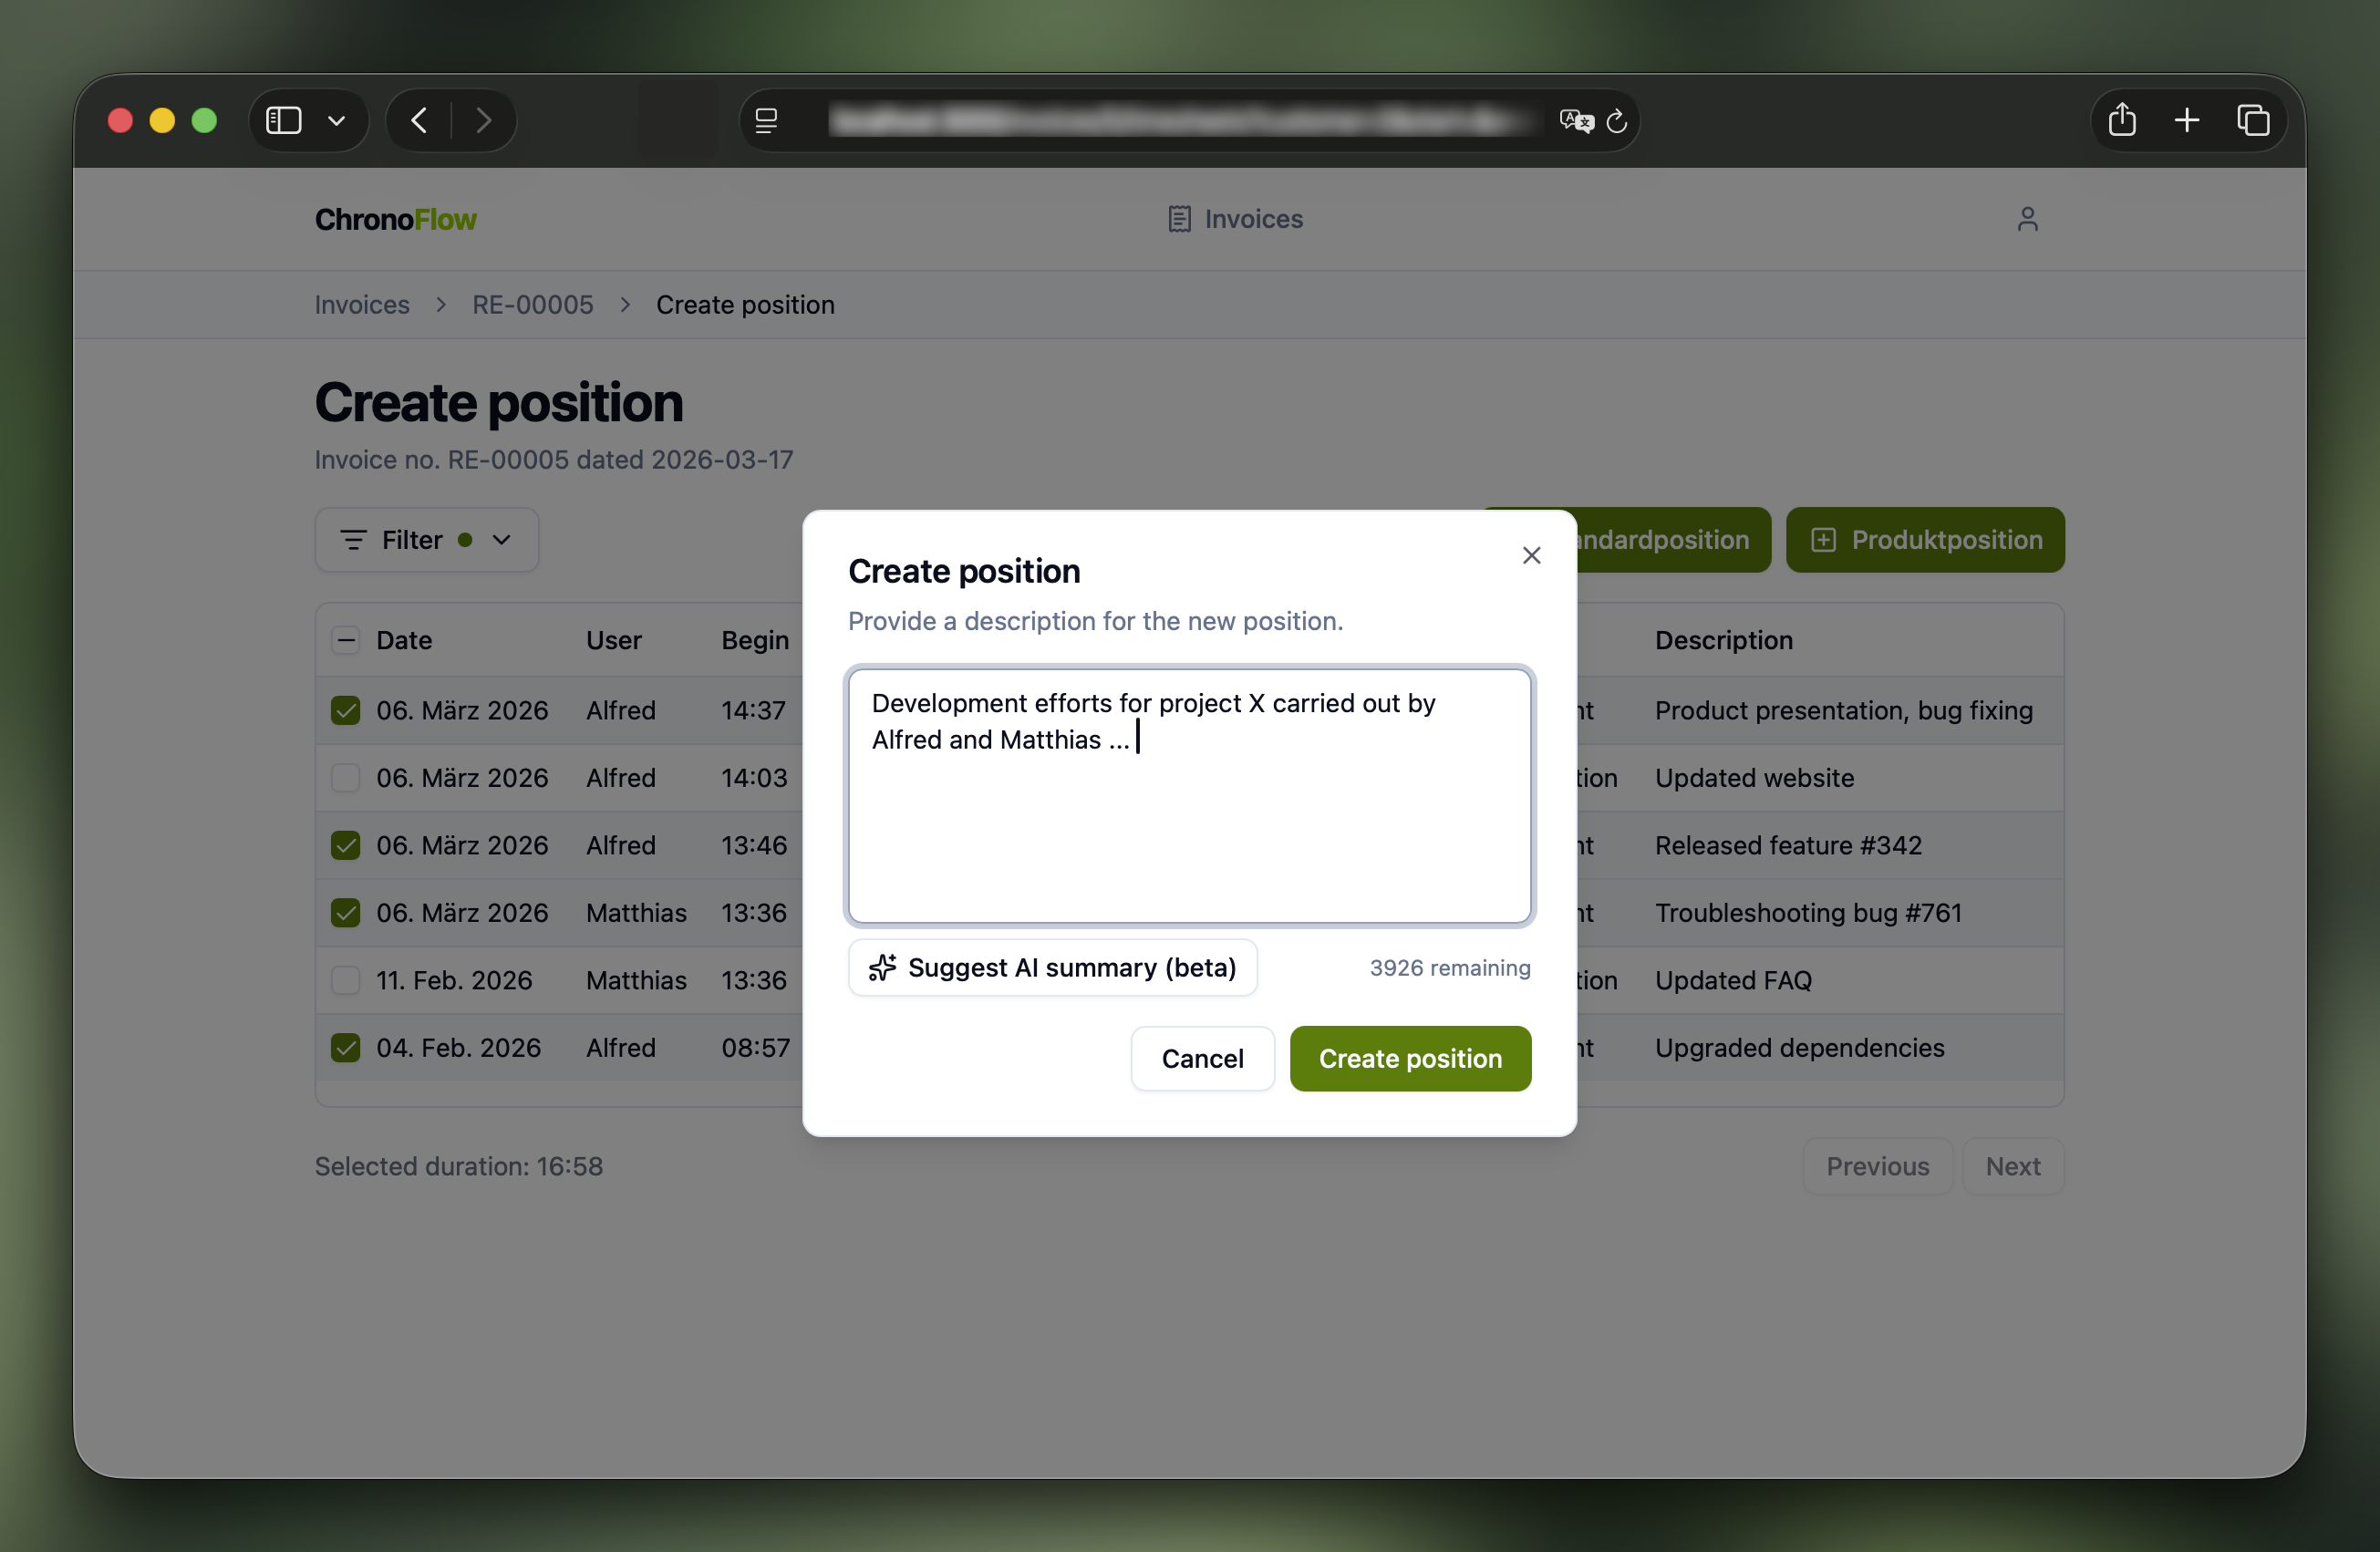
Clicking Create position immediately creates the invoice position via the Bexio API — it will appear in Bexio right away.


Once all positions are created, head over to Bexio and send the invoice to your customer. 🚀