Connecting Kimai
ChronoFlow connects to Kimai using a personal API token. This gives ChronoFlow read access to your timesheets without needing your Kimai password.
Generating an API token
Log in to your Kimai instance and …
- Click your avatar in the top-right corner and choose API Access.
- Open the API Access tab.
- Click + Create, give it a name like
ChronoFlow, setup an optional expiry date and copy the generated token. The token is shown only once - save it before navigating away. - Make a note of the API URL - it will be needed later.

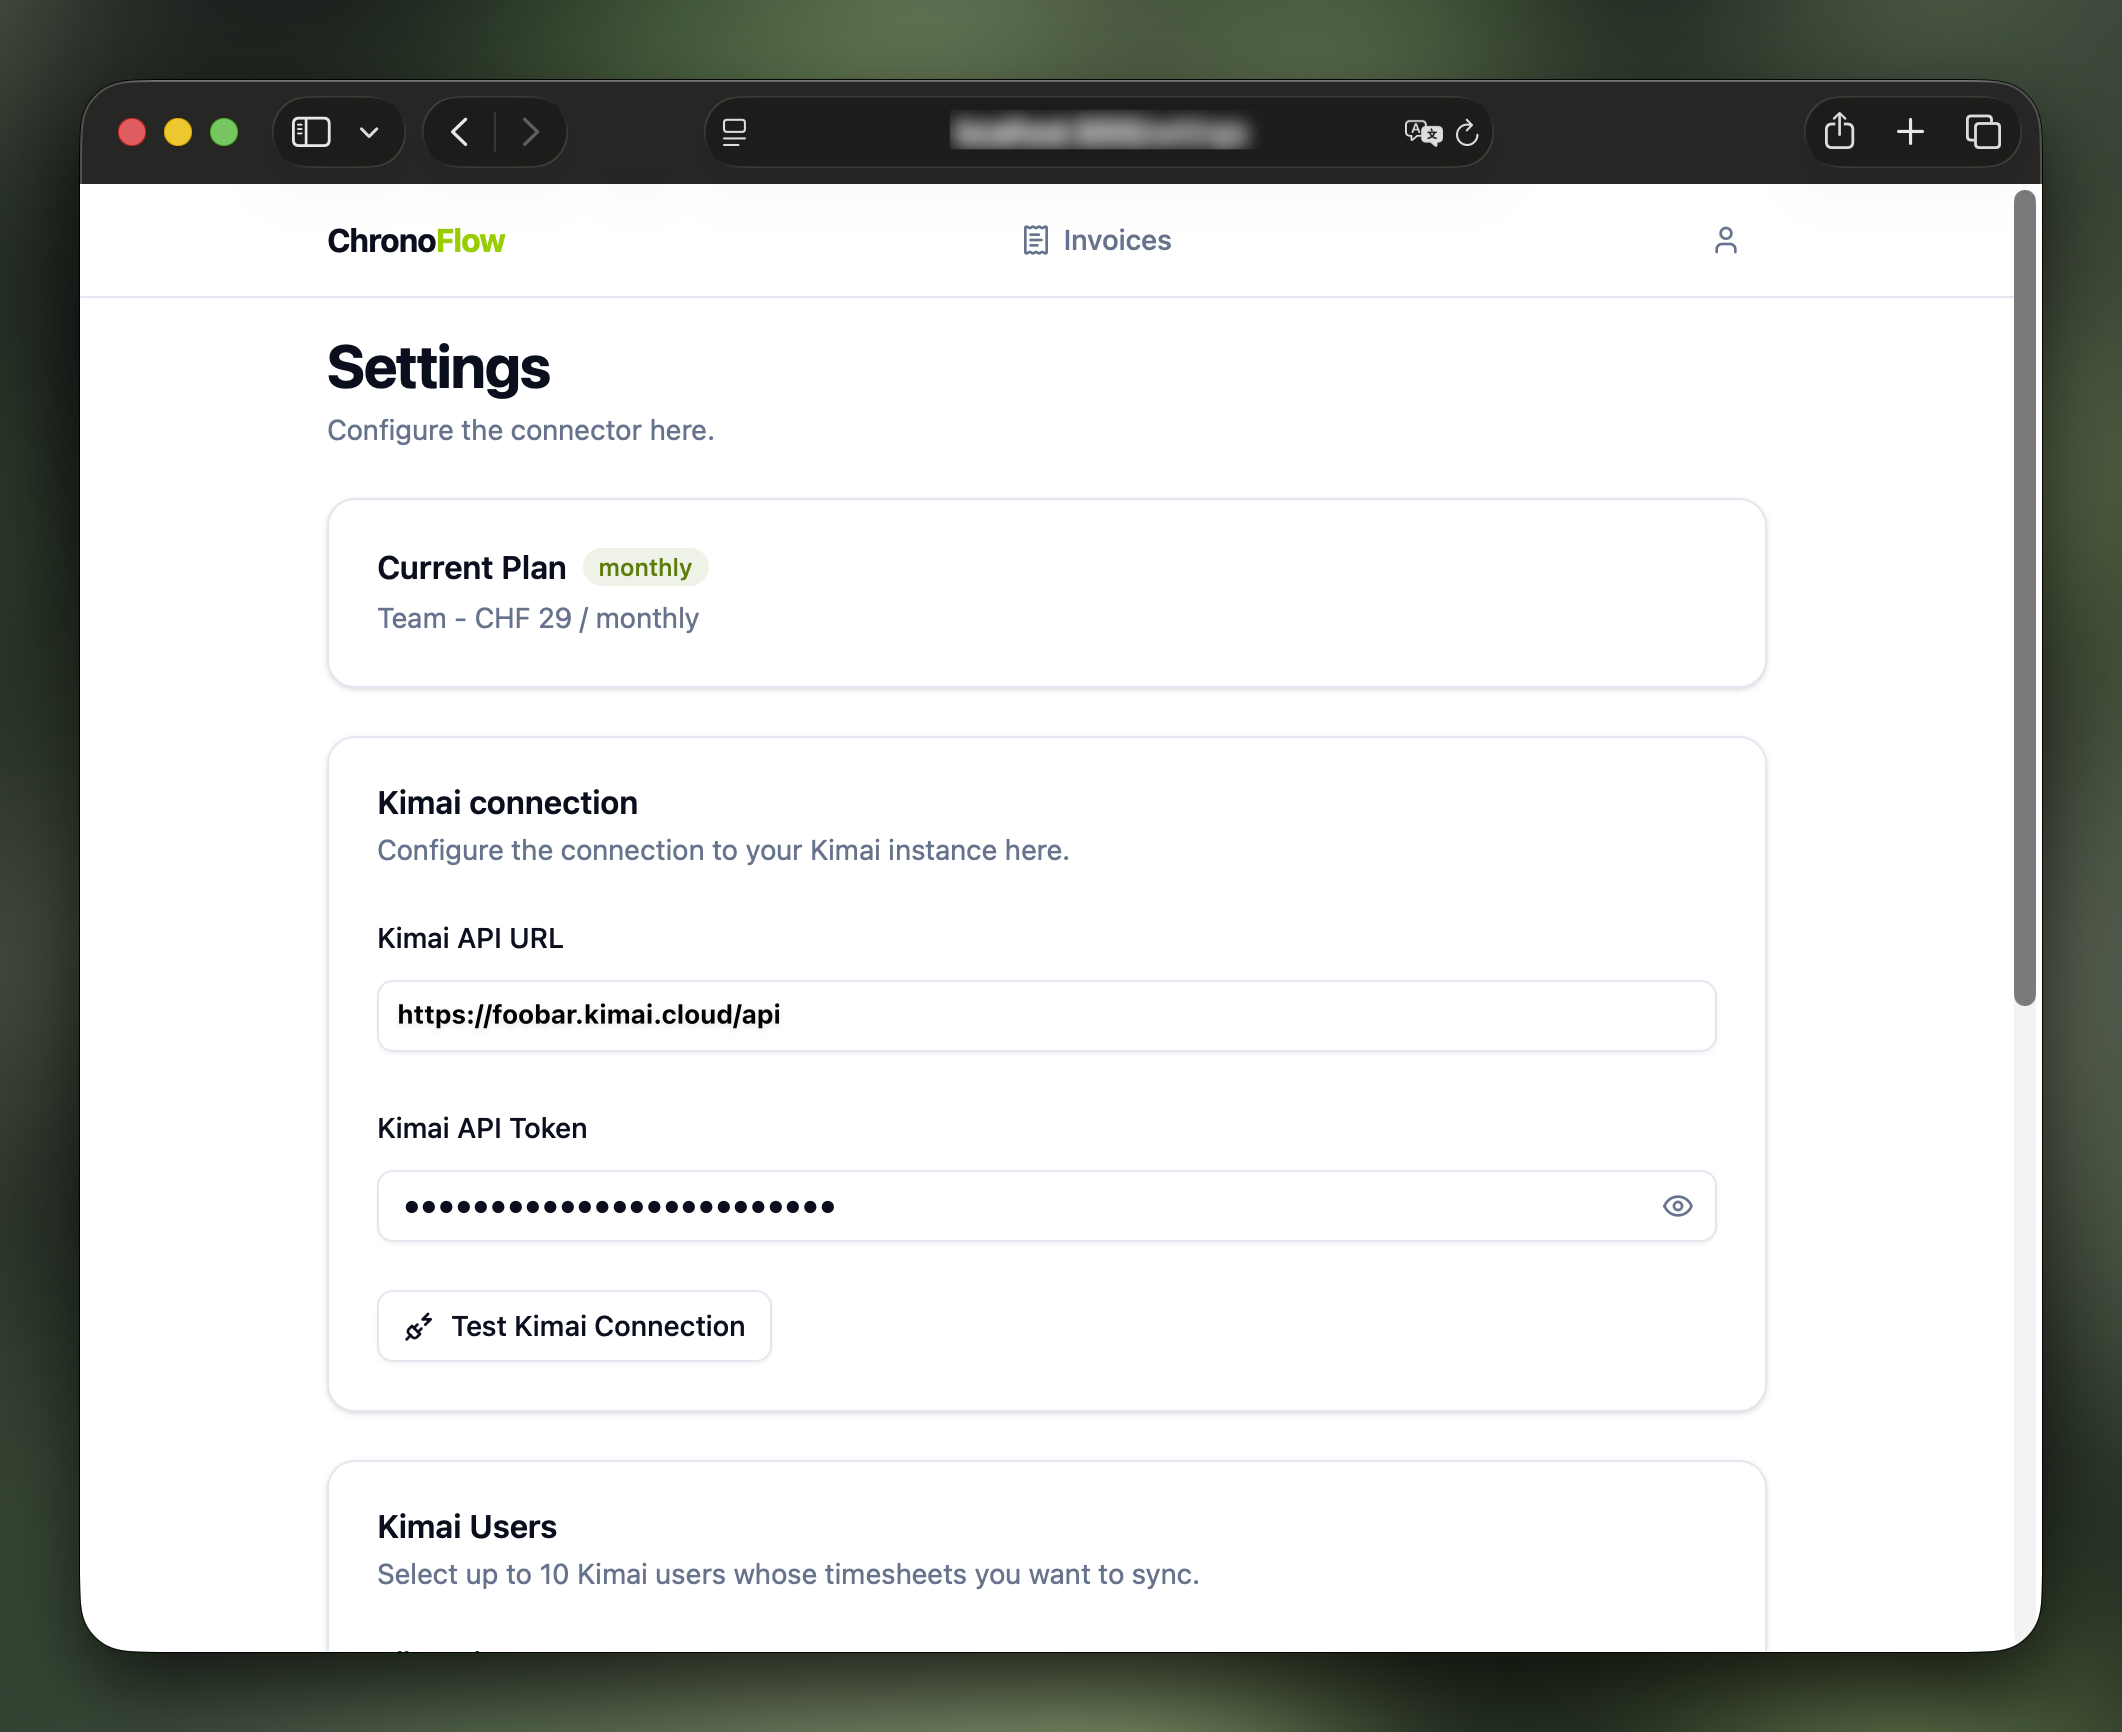
Entering the token in ChronoFlow
- In ChronoFlow, go to Settings.
- Paste your Kimai base URL into the Kimai API URL field. Example:
https://foobar.kimai.cloud/api. - Paste your API token into the API Token field.
- Click Test Kimai Connection to validate the token.
- Click Save. ChronoFlow encrypts the token at rest using AES-256-GCM before storing it in the database.
Required Kimai permissions
The API token needs read access to:
- Timesheets
- Projects
- Activities
- Customers
When using the Solo subscription, a standard Kimai user role has sufficient permissions.
When using the Team or Enterprise subscription, the API token needs the additional permission view_other_timesheet to access timesheets of other Kimai users.
You might also want to consider creating a dedicate Kimai role for ChronoFlow. See the Kimai documentation for more information.